Showing posts with label Radio. Show all posts

Sunday, February 3, 2013

Person & Event Tracker (PET)

I have ran logistics for several horse rides in my area, that consists of having a radio operator at water stops along a 50 mile course, and having them radio times of each horse back to base camp. This information would be collected so I can maintain accountability of each participant of the event. This way, we can see who is still on the trail. This system works well, however, when I have operators that don't want to abandon their location, but need to leave, Base Camp is asked for an ETA of that last rider. In this instance, I looked up some equations, calculated the average speed between previous checkpoints, factored in a hold time, and used it to estimate the ETA to the checkpoint requesting the information. I quickly realized this math could be automated.
Analog Whiteboard for Data
Raw Data Tab, with calculations
My first thought was to host a database on a PC, with a web portal to be used for data entry and display. The main reason for this mentality is i want to be able to enter data quickly via an iPad. When checkpoints call in, they give me a very quick dump of information. Something like "Base this is Water 1 - at 0821, horse number 103 and 107". With data moving quickly, I would like to select the water stop, then type the horse numbers, and the time. The database could put the data entry in the correct place automatically, without me having to scroll and find the field for each entry. I knew this can be done with Java, but I did not have the time to start building something that big from scratch. I began piecing this together as an Excel file, and created the equations to give me the ETA data of each point, based on historical data.
I deployed my creation as Person & Event Tracker 1.0 (PET), and started using it with real data. I was able to let the checkpoints know what time to expect the first riders to arrive, within 5 minutes of the actual time they did arrive. This worked across the whole event, and I was able to have the base camp people ready when the lead horse arrived, proactive instead of reactive. With this information, I was also able to project times of the slow riders, and calculate their arrival time to the finish line. In once instance, I passed along data to the last checkpoint, to inform the riders to speed up or they will arrive 10 minutes past the cutoff time for the event. This also gave me the ability to inform the ride organizers that they needed to go break glow sticks along specific sections of the trail, an hour before sunset. This system was being proven as a great logistical support tool.
Main Display Page on PET 1.0
Main Display Page with Next ETA Field on PET 1.5
The really cool part of this system, was I embedded the Excel file into a webpage that was hosted on my computer. This allowed me to hand the ride organizers an iPad that would display the data I have for them, and automatically update every few minutes. This reduced the chatter between me and the organizers, as they could see the information they needed from their location.

While using this system, I occasionally needed information from my computer through my iPad but I was out of range of the wireless access point, with the auto refresh clearing the data on my screen. I made another page that would display the same data, without the auto refresh, allowing me to walk to the end timers, and collect more data, while still able to see main data.

After a few lessons learned, and wanting to make the system easier for other people to start using, I revised the data entry table, to make it easier to use and lowering the risk of messing up the equations. I also added a "Next ETA" field to the main display, so the organizers can quickly see when the riders should arrive at the next checkpoint.

I am willing to share my work to others interested in tracking an event like this. My current version will track up to 200 people, and up to 10 checkpoints of calculations. I can expand this, but I wanted to keep the file size down for now. The current version does load on a 1st Generation iPad via Safari. The webpage is hosted on a Windows computer, running Internet Information Services as the hosting method. This could be used on a real website, to give this data to ride participants and support personnel if the Excel file is regularly uploaded to a public website. This version must be edited on a computer running either Excel or Open Office. Pages on the iPad will delete some of the complex equations because it does not support some of the methods I use for the math.
 

Summary Tab
showing totals for each checkpoint
Used to see how many riders still need to go through a checkpoint.

Event Variables
Distances between checkpoints and hold times are entered here.
Accurate distances = Accurate ETAs
Raw Data
This is the main working tab, for data entry. The equations have been moved to protect them from changes.

If you are interested, just send me an email or post here. My Email address is current on QRZ.COM

Saturday, June 26, 2010

Field Day 2010


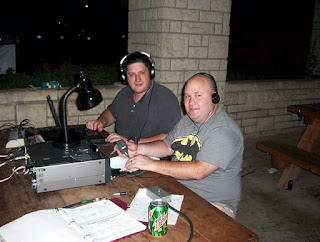
I thought I would miss Field Day this year due to operational training, but I managed to still participate. With the help of the ARRL Field Day Locator, I found a club near me , K5FC, in Dallas, TX. They were setup in a large park on a hill, with many antennas. I was given a friendly tour, and then I helped them erect a 80m Half Wave Vertical Antenna. This thing was huge, with several 60 foot long ground radials. I am not sure why, but they put a toilet float on top of this monster. They joked that if it flooded, the antenna wouldn't sink.

At the base was two tuning coils mounted onto a large disk with bolts around the outside for ground radials. They used heavy duty fishing line for guide wires mounted half way up this antenna and spaced by 90 degrees.


After chatting with a few hams, I started looking through the club logs, to see if WA6YBN showed up anywhere. No luck there, so I started helping to log on a 20m station. While running shotgun, we contacted W6TD, which I recognized as the Southern Inyo Amateur Radio Association listing themselves in Orange County.

I really liked the simple software they were using for logging. They were using Squirl Field Day Logger 8. All I had to do was enter the callsign, and it would check for a duplicate. Then I would enter the Class, and Section. The Section drop down, actually shows the whole name of the area. Once entered, it shows a map with number of contacts, based on Sections. By the time I left, that station already had about 30 contacts from California.


--
KI6PSP (Ed)

Saturday, June 12, 2010

Club Repeater Buildout

I began building and testing an Allstar Repeater for my local club (WA6YBN), using a computer from a previous blog post. The Allstar install disk is not like a Windows install, it installs basic functionality, then gets the rest from the Internet. The install disk will show a text mode menu system with colors, but this is as fancy as an Allstar build gets. You will need at least a 4GB HDD. It will setup, partition, and perform the install. After the install, it will start getting material from the Internet and updating itself, that took about 45 minutes for me. I just left it to do its thing for a few hours, and then it will be almost ready for configuring. The first thing it asks for is a password for the root account. Pay attention here, because if you just hit the enter key a few times here, you won't be able to login.
     A script will start asking Allstar related questions, and it will program your node number, and then ask you to plug in your USB Radio Interface, then it will reboot. After that completes, you can login with "root" and the password you set.
     I grew up installing Windows 95 over DOS, so command line is not new to me, but Linux is a little intimidating because of the different structure. There is no GUI (Graphical User Interface), so you will need to understand how to navigate using the keyboard. I wanted to setup several capabilities for this Allstar Node, Echolink being one of them. I will demonstrate basic commands using the procedures I used to configure Echolink on Allstar. My reference for setup is located here. There is a wealth of information on app-rpt.qrvc.com related to setting up an Allstar Node, but come linux experience is needed, that you can learn here.

The starting point here is how to change folders. The "cd" command is for Changing Directories and it is used like so:

[root@test ~]# cd /etc/asterisk
[root@test asterisk]#

Notice the "/etc/", the Asterisk config folder is in the /etc/ folder. The folder name you are in shows in the brackets of the command line header. If you enter "dir", it will show you a listing of what is in the directory. To go back to the root folder, simply enter "cd", with no folder destination. When you are back at the root level of the folder structure, it will show "~", as you are not in a folder.

If you need to make a folder, use "mkdir foldername", where foldername would be what you want it to be called. Remember, whatever folder you are in, is where you will be creating this folder. So use the cd command to navigate to where you want this folder first.

To copy files, I find it easiest to go to the folder where the file resides, and then use the "cp" (copy) command like this:

[root@test ~]# cd /usr/src/configs/examples/echolink/
[root@test echolink]# cp echolink.conf /etc/asterisk/

Editing configuration files is a little different. first navigate to the folder where the configuration file you want to modify resides.

[root@test echolink]# cd
[root@test ~]# cd /etc/asterisk

Next we need to edit the file with a program called VI Editor. To edit the echolink.conf file, type the following:

[root@test asterisk]# vi echolink.conf

This will open a full screen editor, and display the configuration file. To move up and down the file, use the arrows on the keyboard. To make changed, first hit "i", and INSERT will appear on the bottom left of the screen. you can now make changed to the file. Some lines start with a ";". Those lines will be ignored, and it is an easy way to turn a command on or off by adding or removing the ";". Sometimes comments for commands will be on the same line as the command, the system will simply ignore anything on that line after the ";" character.

When you are done with your exiting, hit the "ESC" key to exit the edit mode. To quit the editor, first type ":", then the program will accept commands like "q" for quit, "wq" write and quit, "q!" for quit without save

The program that does the work of the repeater is called Asterisk. It was initially intended for phone communications. Tuning of the repeater can be done now, I followed instructions located here. I did need to borrow a service monitor from a friend to complete the tuning, and I also had to adjust the gain level in the rpt.conf to make it sound a little better. When making various changed to the config files, I would usually restart Asterisk so it would take the new settings by executing "service asterisk restart", this way I wouldn't have to do a full reboot.

A quick Duplexing Vs Simplex note, Allstar defaults to full duplex, so it will be impossible to control or use if you are setup for simplex without adding "duplex=1" to the rpt.conf file, in the section for your node number. 2 is the default to run as Full Duplex, 1 is Semi-Half Duplex and will give all the tones and identifiers, while 0 is full Half Duplex with no tones or identifiers.
If you are planning on setting up your Allstar Node with Echolink capability, you will need to go through the validation process, login and setup as a repeater to get a node number. Once you have that all complete, its just a matter of using the correct DTMF commands.

*1node Disconnect Link
*2node Connect link in monitor mode
*3node Connect link in transceive mode
     For Allstar, use *3nnnn, all Allstar nodes start with a 2
     For Echolink, use *33nnnnnn, ex, *33009999
     For IRLP, use *34nnnn
*4node Enter command mode on a remote node
*7 Local connection status

*80 Force System ID
*81 Say System Time
*82 Say app_rpt software version
*85 Last active node (system-wide)
*87 System-wide connection status

Have Fun with Allstar


Ed
KI6PSP
http://KI6PSP.blogspot.com